Custom List shaping queues – Use Case
Use Case Example
Once you have registered a LucidView Portal Admin Account and followed the steps to make your LucidView Enforcer you can start creating custom shaping lists.
We have included the Use Case below as a guideline:
Introduction
A basic example of shaping queues on the Mikrotik using the dynamic address lists from the MikroTik Enforcer Portal is described below.
In this example, Media streaming such as Netflix and Youtube videos should be placed in a lower priority than other traffic. A bit more than half of the line will be guaranteed to normal traffic with the rest being allocated to media streaming.
Custom list configuration
On the portal, the following configuration will be implemented to tag the multimedia traffic.
The first step is to enable the advanced Custom List option.
Step 1
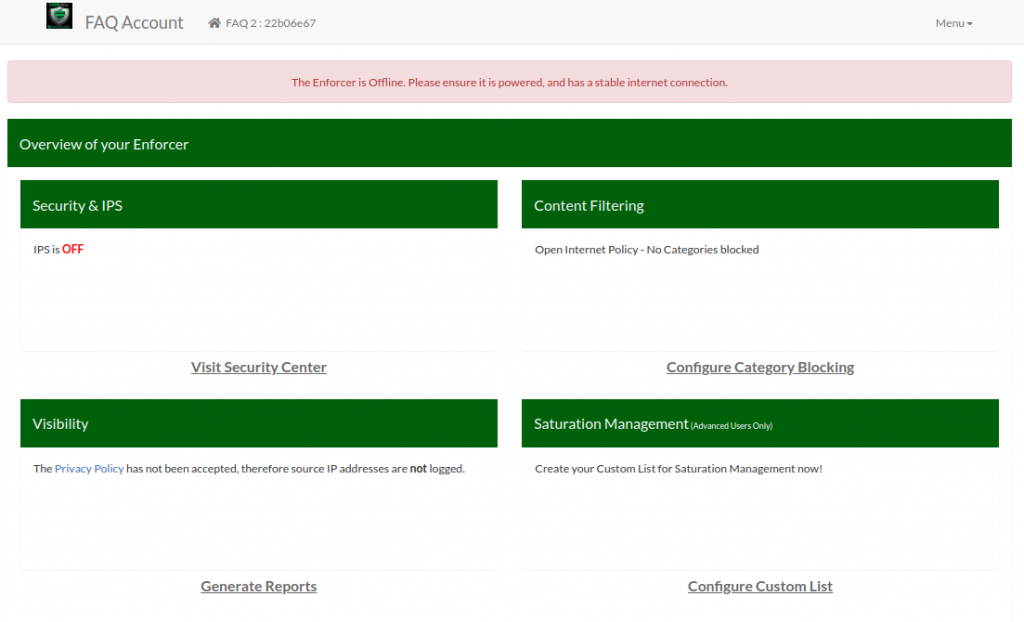
The first step is to enable the advanced Custom List option. This is done by ticking the “Saturation Manager” tick box as shown in the image below.

Step 2
Login to the Enforcer or Enforcer Profile that requires the saturation configuration.
You should now see the following page on your portal.
In the bottom right hand side of the screen you will see “Configure Custom List”. Click on the link.
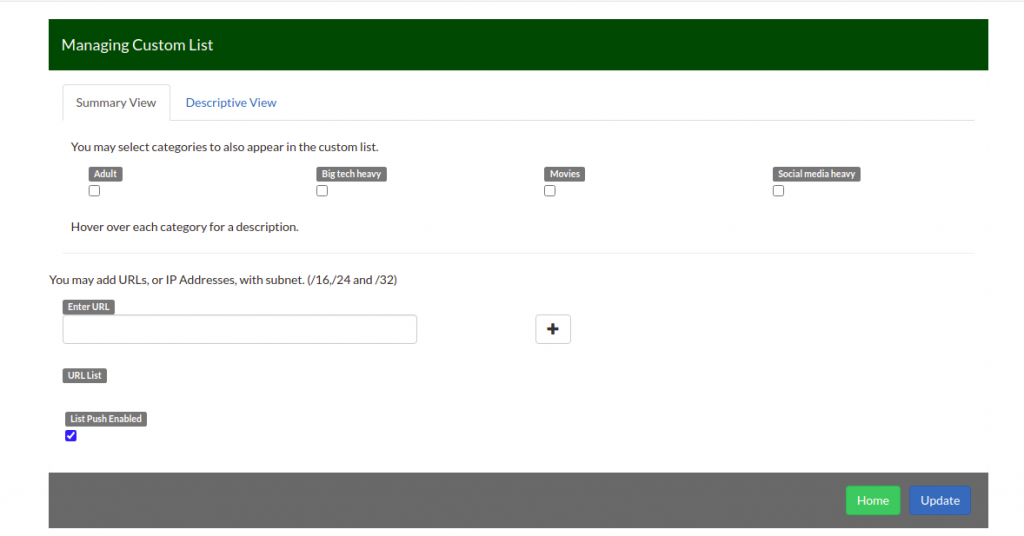
Step 3
Select the categories you would like to shape.
We have selected Movies. In addition, Instagram and video from Facebook have been tagged in the URL list.
Remember to check the ‘List Enabled’ box so the list is deployed to the Mikrotik.
Click on the “Update” button to save your configs.
Address lists
Local network
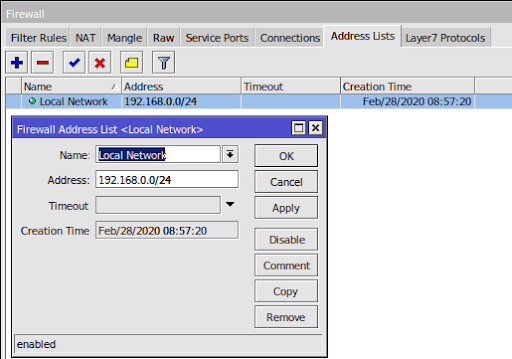
/ip firewall address-list
add address=192.168.0.0/24 list=”Local Network”
Custom list 1
This list will be populated by the LucidView cloud portal. It will appear as a new address list named lvcloud_custom_list_1.
Firewall
Tagging of traffic
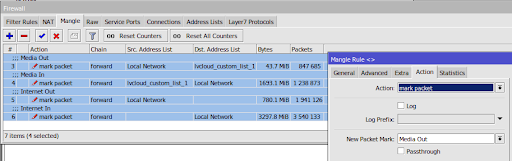
/ip firewall mangle
add action=mark-packet chain=forward comment=”Media Out” dst-address-list=lvcloud_custom_list_1 new-packet-mark=”Media Out” passthrough=no src-address-list=”Local Network”
add action=mark-packet chain=forward comment=”Media In” dst-address-list=”Local Network” new-packet-mark=”Media In” passthrough=no src-address-list=lvcloud_custom_list_1
add action=mark-packet chain=forward comment=”Internet Out” new-packet-mark=”Internet Out” passthrough=yes src-address-list=”Local Network”
add action=mark-packet chain=forward comment=”Internet In” dst-address-list=”Local Network” new-packet-mark=”Internet In” passthrough=yes
Shaping queues
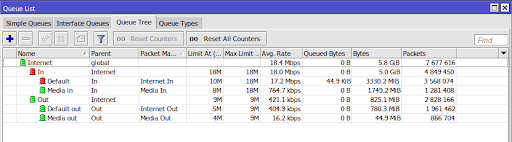
/queue tree
add name=Internet parent=global queue=default
add limit-at=18M max-limit=18M name=In parent=Internet queue=pcq-download-default
add limit-at=9M max-limit=9M name=Out parent=Internet queue=pcq-upload-default
add limit-at=8M max-limit=18M name=”Media in” packet-mark=”Media In” parent=In queue=pcq-download-default
add limit-at=4M max-limit=9M name=”Media out” packet-mark=”Media Out” parent=Out queue=pcq-upload-default
add limit-at=10M max-limit=18M name=Default packet-mark=”Internet In” parent=In priority=1 queue=pcq-download-default
add limit-at=5M max-limit=9M name=”Default out” packet-mark=”Internet Out” parent=Out priority=1 queue=pcq-upload-default